BareMetal-C
VS Code & Build Environment Setup Guide
This guide will help you set up Visual Studio Code (VS Code) and configure it to work with your Docker-based build environment.
0. Prerequisites: Tools and SimulIDE installation
Before setting up VS Code, ensure the tools (which includes GitHub Desktop and Docker Desktop) and SimulIDE are installed and running, as VS Code depends on it.
- Follow instructions to setup tools.
- Follow instructions to setup SimulIDE.
1. Install Visual Studio Code
For Windows
- Download the Windows installer from the official website: code.visualstudio.com.
- Run the installer (
VSCodeUserSetup-{version}.exe). -
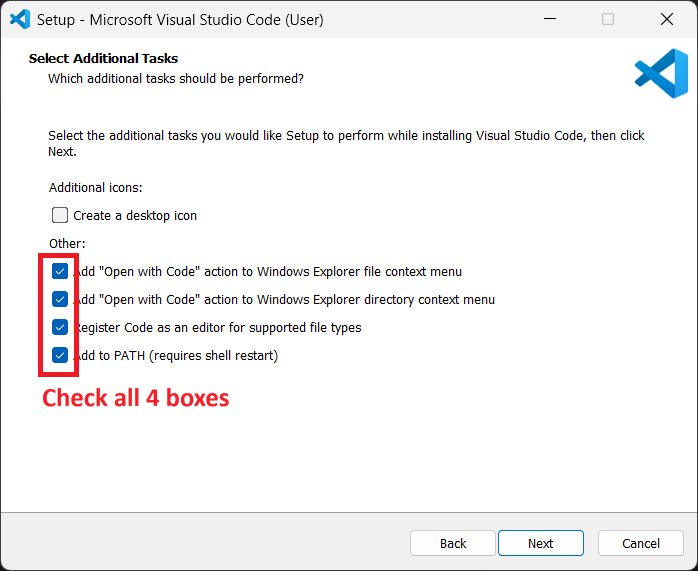
Follow the prompts. Important: On the “Select Additional Tasks” screen, check all 4 boxes. The last box says: “Add to PATH (requires shell restart)”.
- Click Install.
For macOS
- Download the macOS Universal build from the official website: code.visualstudio.com.
- Open the downloaded zip file.
- Drag the
Visual Studio Code.appinto your Applications folder. - Launch VS Code.
- (Optional but Recommended) Open the Command Palette (
Cmd+Shift+P), typeShell Command: Install 'code' command in PATH, and press Enter.
2. Set the profile and open the Workspace
-
Quit VS Code if it is open.
-
Click this link to open -> BareMetal-C Student Profile
Your web browser will open a new page that looks like this:
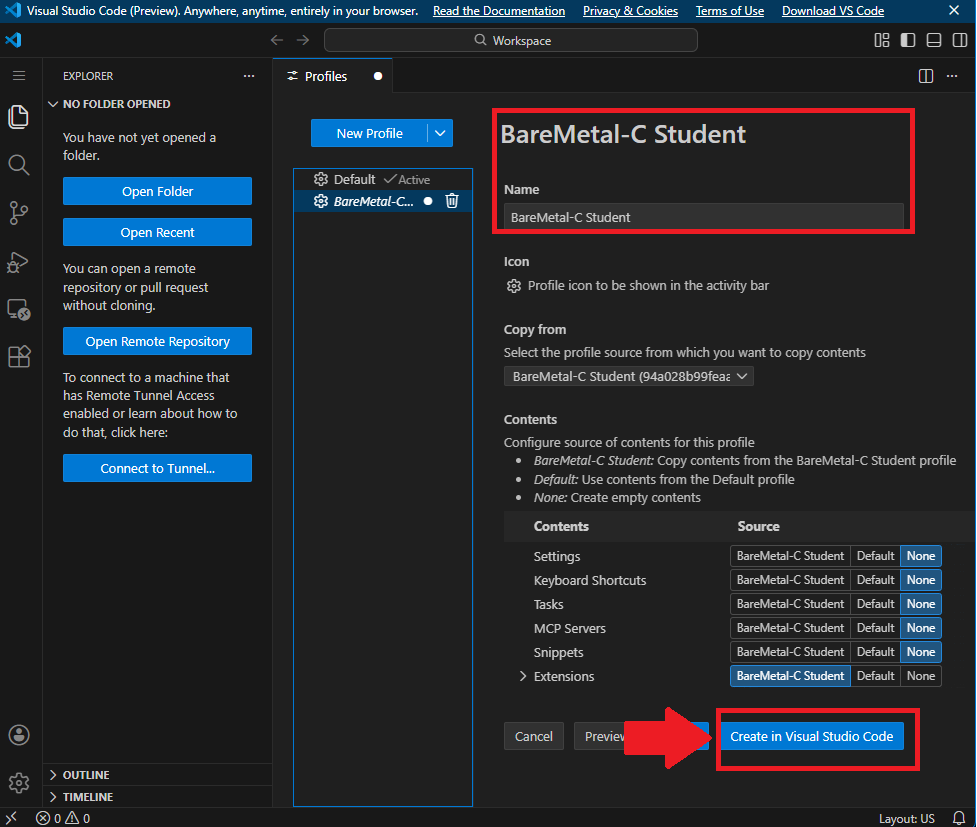
Click on
Create in Visual Studio Codeand give permission to your web browser to openVisual Studio Code.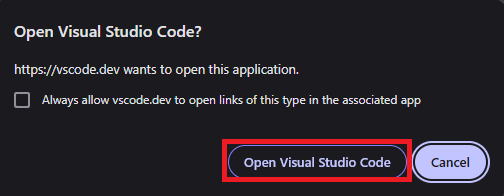
-
VS Codewill open a page like below: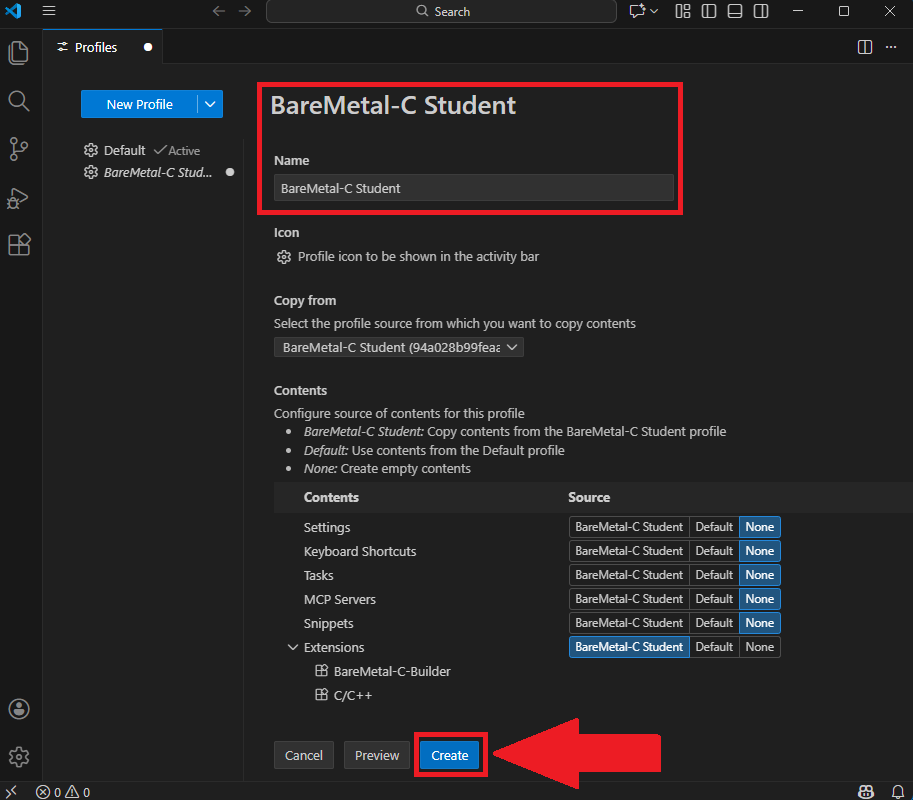
Click
Create.And the next window will pop up. Click
Trust Publisher and Install.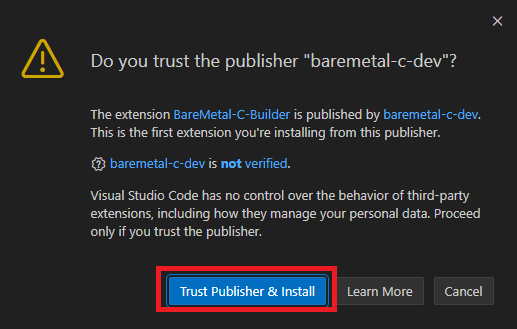
This will take a while, and finally, VS Code window will show up.
-
Click the
settings icon(1). ChooseProfile(2) and selectBareMetal-C Student(3).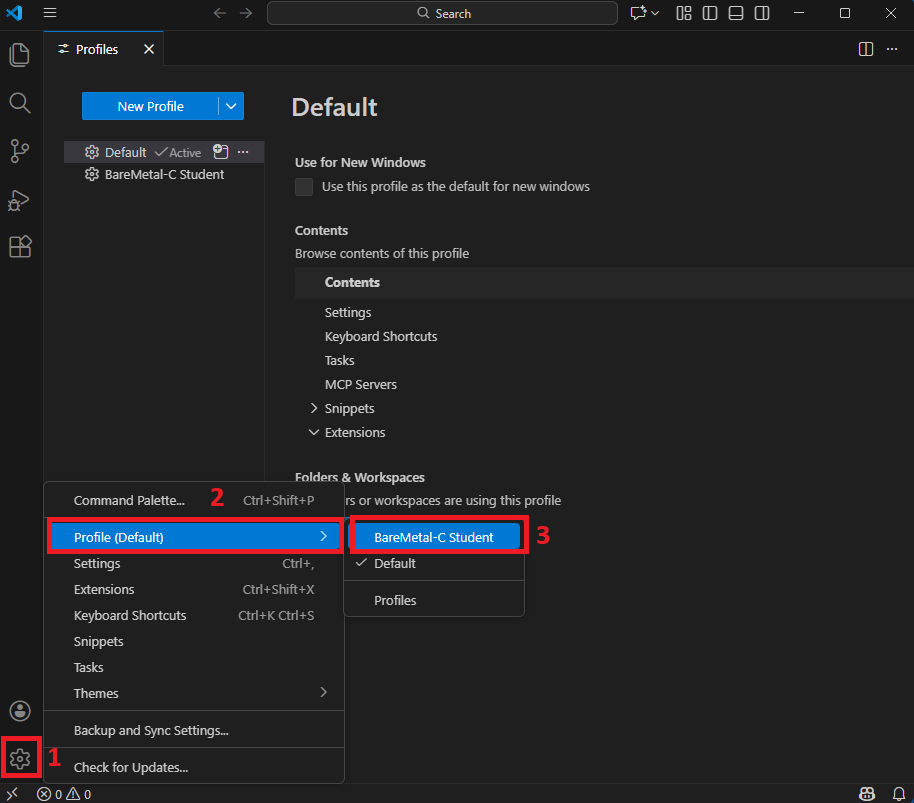
-
Check the gear
⚙on the bottom left, it will have some characters on it likeBAor something else (1). ClickFileandOpen Workspace from File...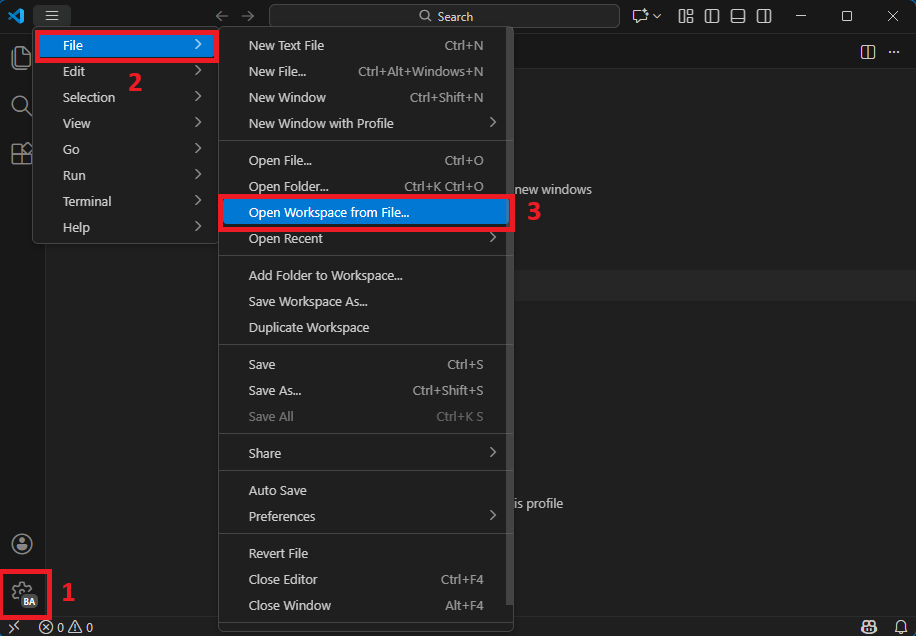
and choose this file:
Windows:
C:\Users\NAME\Documents\BareMetal-C\student.code-workspacemacOS:
~/Documents/BareMetal-C/student.code-workspace -
When asked
Do you trust the authors of the files in this workspace?. ClickYes, I trust the authors.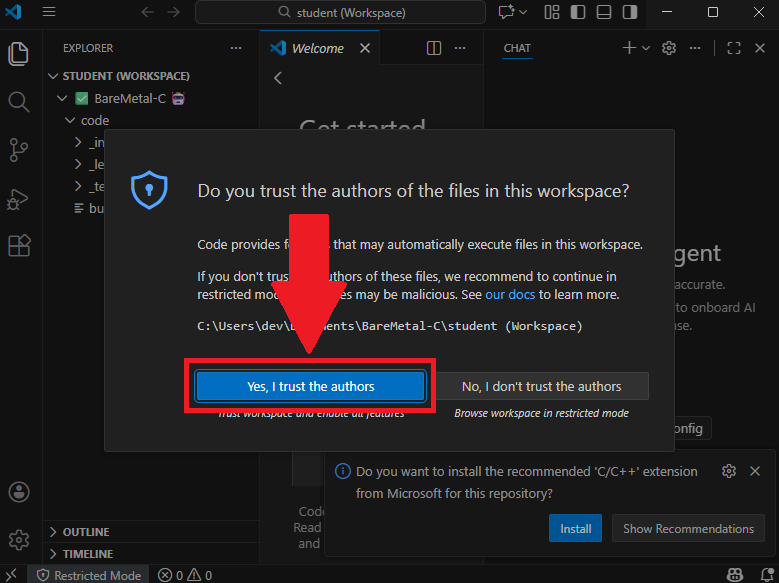
-
If things work correctly, you will see:
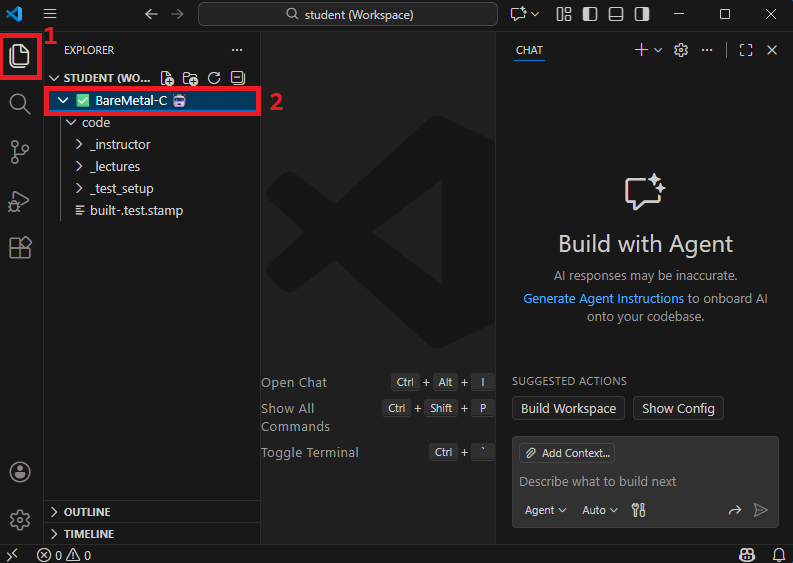
If it doesn’t look like the screenshot above, click
ExplorerIcon (1).Then, check the name at (2). You must see the checkmark (✅) and the robot (🤖). The full thing in (2) must be:
✅ BareMetal-C 🤖If it does not look like the above, close
VS Codeand re-open it and see the steps that you may be missing. -
Check extension:
Clieck
Extensionsbutton (1), and you should see the extension installed. (2)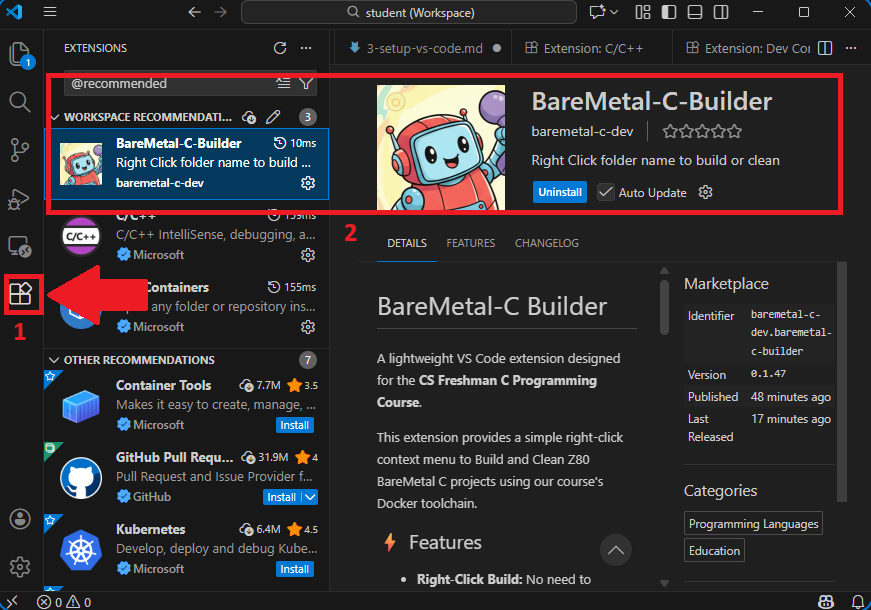
Double clicking student.code-workspace is the way we start VS Code for this class.
4. Running the Build Environment
-
Click
Explorericon to go back to folder explorer. Then right click oncodefolder: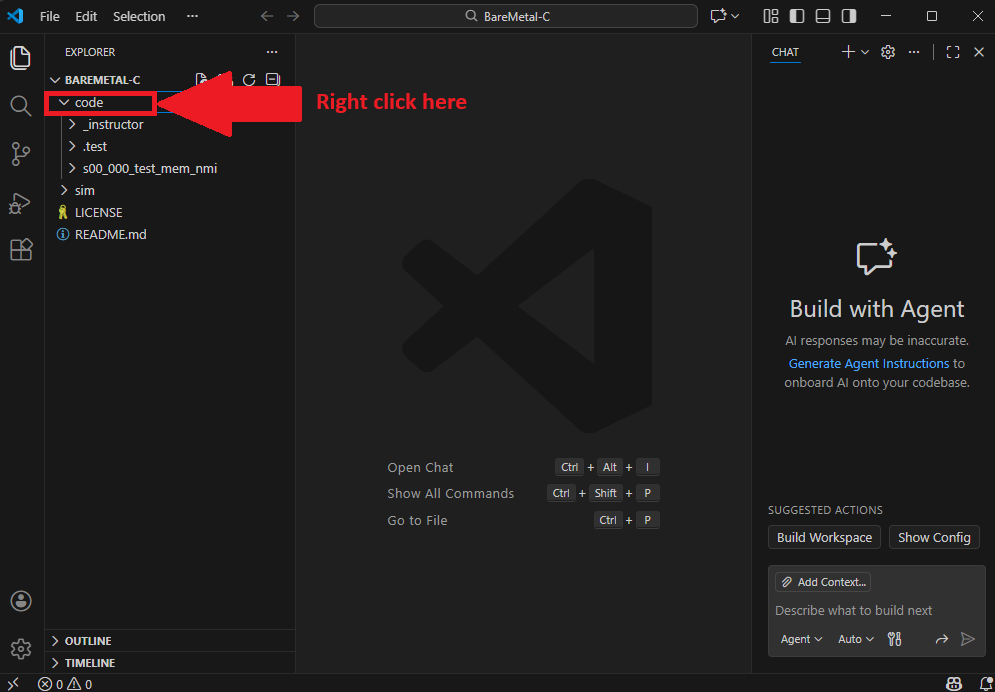
-
A context menu opens up, choose
BareMetal-CandBuild BareMetal-C Projects (All)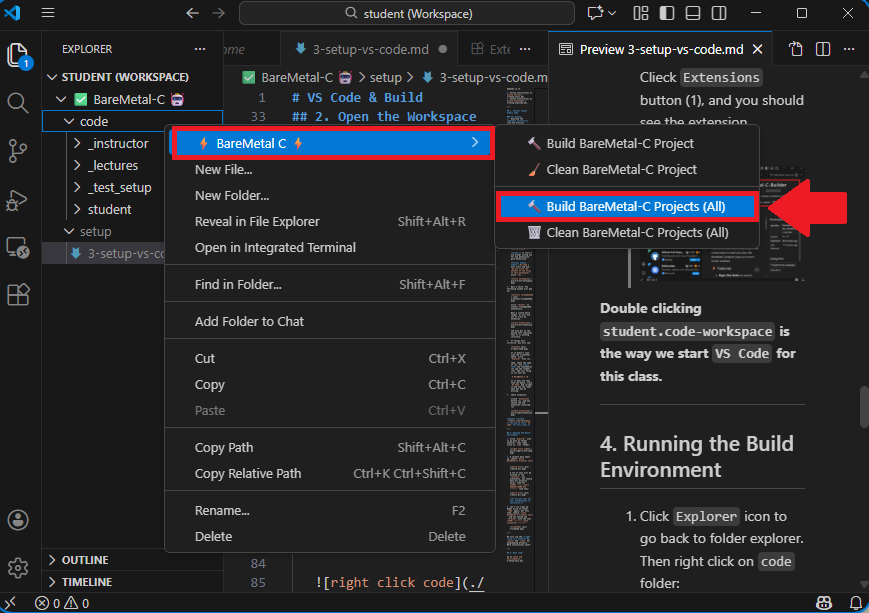
A lot of text will be printed in the
terminal, but eventually, you should have all projects built. Look for(TIME) ------ built PROJECT_NAME.bin -------like this: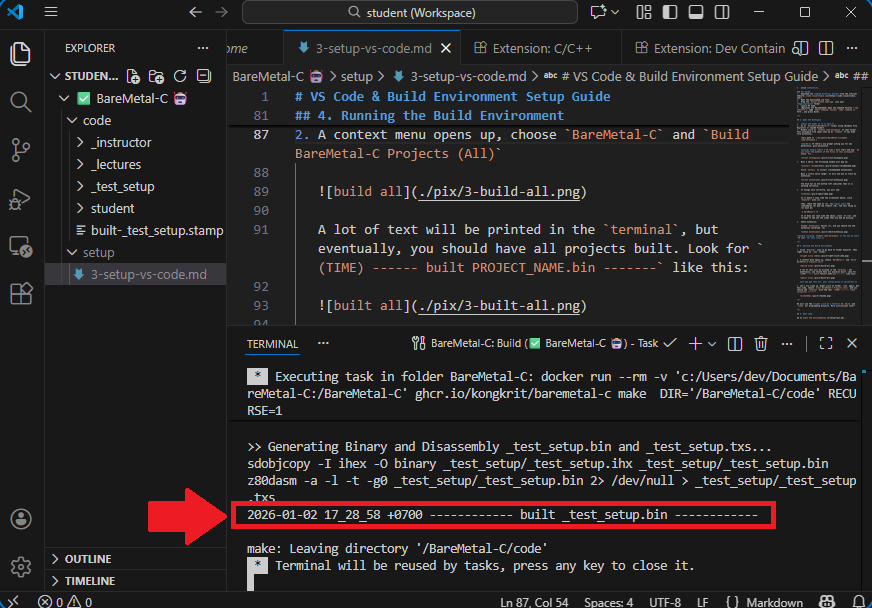
If you got this far, your installation is successful.
-
Let’s try clean up. Right click on folder
codeagain, but this time, chooseBareMetal-CandClean BareMetal-C Projects (All)and you should seeterminalwith the text(TIME) -------- clean successful --------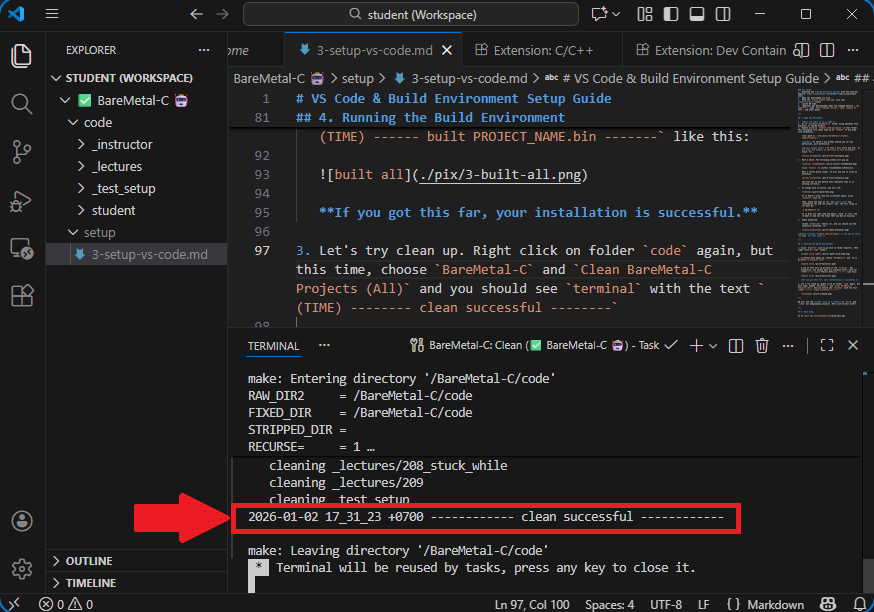
We will use the right click on a folder to build and clean our programming projects. More instructions later!
5. Next step:
Go to test the environment.
Go back to home page